Monday, July 31, 2017

Video #2, Figured Out YouTube!


So here is Video #2 which goes into a little more detail than Video #1. I set up a YouTube channel so I could put longer videos on the blog. I'm trying not to let them go too long because then it just gets boring. LOL! Here is a link to my YouTube Channel if you want to view it there and subscribe. Looking forward to getting more of these done in the future for you and hope you enjoy them as much as I do making them! See you next time!


About Those Seed Beads


Beads come in all varieties of shapes, sizes, colors, and especially quality. I use the highest quality I have found to date of Japanese seed beads, and believe me, I have tried a lot of them. My search began years ago with my daughter's Christmas stocking I was cross stitching. This was a difficult piece to stitch for a number of reasons but something I was excited about was adding my own distinctive touch to the design by adding glass seed beads. I bought what I considered to be the very best beads I could find which was sold by my local needlework shop. I stitched them on and was working on a different part of the design when I realized that the finish was wearing off the beads the more contact I had with them, either by touching them or rubbing against them on my clothes. I was frustrated and angry that I would have to go back and not only get them off the stocking but now had to find another alternative. It wasn't like good quality seed beads could be found at just any local hobby and craft store, and how would I know which they were even if they did?

So I began the arduous task of going on line and researching, researching, researching. Oh so many articles, websites, blogs, discussions with friends and strangers, and looking into what pattern designers were using. As it turned out, I discovered the best beads that had a consistent sized larger hole to accommodate a tapestry needle was made in Japan. Not only did they have the right size and quality, but they made them in an enormous variety of colors, finishes, and sizes. I was in bead Nirvana! I still incorporate these beads in my work since they hit the high quality mark every time and have never failed to exceed expectations.

The importance of quality in what I use is supreme and no substitutions are ever made in favor of expedience or convenience and even these tiny seed beads are no exception. Longevity dictates that even they need substance and quality.

Thursday, July 27, 2017

Vintage Treasures


My love of vintage jewelry began as a child. Back in the fifties and early sixties, my mother, and in particular my paternal grandmother, would don beautiful costume jewelry whenever leaving the house for errands, as was the custom for most women back then. My fascination was particular with the rhinestone jewelry they wore. The colorful dazzle of what I considered precious treasures fascinated me and it was always a treat to see them. Of course they fell out of favor later in the 60's and 70's for love beads and more organic materials such as leather and cotton. I mourned the loss of those beautiful vintage pieces and picked up a few here and there when I could but soon lost track of them in favor of the leaner, cleaner look of the jewelry designs since then. Then in my fifties, maybe as I began feeling more nostalgic, I wanted to revisit those lovely objects again and so my search began. Brooches were my favorite since the designs could be so much more intricate and use a variety of materials. They also came in a great array of sizes too and so could accommodate any number of projects, from large or small.

After years of seeking out what I consider to be beautiful and interesting brooches, I amassed quite a large collection to choose from when designing a project. The brooch actually determines the colors and the design. The fibers and embellishments come later and sometimes I have those on hand and other times I have to do some sleuthing to find what I need. It makes it easier for me to get ideas on the actual content of the work when I have a good stock of things to initially begin the search with and can either include or eliminate items and ideas as I go. That is why I have a large collection of beads and fibers, as having them immediately available makes the work progress faster than if I didn't. So actually having the brooches and materials here provides me an endless source of inspiration and I am seldom at a loss for what to do next. As a matter of fact, I have quite a few things in the queue now that I am very excited about.

Often when I look at these alluring pieces I wonder about the amazing women that owned and wore them. Was it a gift from a loved one to her? A piece she loved and saved any extra nickel and dime for? Something she obtained as a result from the loss of a friend or relative? Did the piece travel with her across the United States or even to different parts of the world? So I like to make up stories about the jewelry as well, and that makes them even more personal and valuable to me, and I hope to those that enjoy my work as well.

Monday, July 24, 2017

Amazing Acrylics


I have some beautiful acrylic fabric paints that I have been experimenting with, in addition to the Shiva's. They are different to them but still wonderful. I have Jacquard Lumiere and Martha Stewart acrylic fabric paints and really enjoy using them both. One of the merits of the acrylics is that they dry super fast so there is no waiting. They are washable after being heat set, which is easy to do with an iron, and I believe in many cases are dry cleanable as well. The cleanup is very easy with water and just about any kind of soap. I use the Martha Stewart craft paint brushes which have held up beautifully and are not an expensive investment. The shorter stiffer bristles hold up well on the uneven, rough texture of the Aida. I don't mean to sound like a commercial for Martha Stewart, but hey, if the product is good, it's good no matter the source right? And if you get more bang for your buck, then that's just icing on the artistic endeavor cake. 

Oh, and pay no attention to that lavender color sample! LOL! It was in with my greys and so I thought it would be fun to see what it looked like on the fabric. Absolutely no way does it go with the color scheme!

I do want to primarily use silk fibers on this project but did not have the Splendor in all the greys I needed, so those are on order and hopefully will be here next week. If they work out, fingers crossed, I will just have to match my paints with them which is the reason for the sampler. The fabric has been prepped, which means it is washed, ironed and the edges treated so they won't fray. Once the fiber and paint are matched, I can get going on painting the fabric so there will be no delay in getting started once I finish Ladybug Lake.

I'm hoping this will all work out according to plan but if they don't, there are other options available. It is always good to have a back-up plan I've learned! LOL!

So until next time another thought nugget:

"Only put off until tomorrow what you are willing to die having left undone."
~Pablo Picasso

Thursday, July 20, 2017

Glorious Vintage Glass Beads!


When I was looking for vintage brooches I ran across some vintage glass beads designed by Miriam Haskell, a well known American jewelry designer of the 20's through the 60's, whose company still makes beautiful jewelry. I was enthralled by the simple beauty of these beads, and amazed how unaware I was that glass beads from the past survived to the present. What a revelation. I then began my search for what I thought I could use in my work of these glorious treasures. To my surprise and delight, I found there were more than I expected.

A lot of what I found I couldn't use, like cabochons, being too big, and unworkable colors for me, but there were many that I could use. These are so special to me because of their history and the fact that they are survivors of those bygone times which adds an intrinsic value that could not otherwise be had. Since these are not a renewable resource, they add a unique feature to my work.

The problem is, because they are finite and quite lovely, it is hard to let them go! LOL! It is crazy how you can be so anxious to use them and yet know that once gone, they can't be replaced, so there is that hoarding aspect to contend with too. What a paradox!

Since these beads cannot be used in every project, it is easier to incorporate them in the smaller group of those that they will work in. Letting go of them over a longer period of time will ease the loss of a dwindling inventory, although I will still be on the lookout for more and hopefully able to replenish stock, even if not in the same kind. I think most people can identify with these beads in that they are still around, surviving the abuses of time and existence. And like us, they can still maintain a quiet dignity and beauty all their own and keep shining through somehow in their own special way.

Wednesday, July 12, 2017

Working with Shiva Paintstiks

Shiva Painstiks are a wonderful way to add color to fabric. What makes them exceptional is that they are made from oil rather than acrylic, so they have a rich depth of color that is hard to beat. They come in a nice variety of colors, are blendable, and have beautiful iridescent colors as well. They stay put when applied and do not bleed around the borders of their color. Clean up is easy. The down side is that they are difficult to apply evenly to a rough textured fabric like Aida cloth and they do take a while to dry. They are a bit messier than acrylics as well, since they have a tendency to leave tiny bits of themselves around the work area (so you have to be diligent since they are permanent). That is why you see the parchment paper under the items. But they are washable (not dry cleanable) and they are OIL paints for use on fabric which I absolutely love. So here you can see that I am experimenting with the different colors to see how they look and how fast they dry on my samples of Aida. I'm also looking at silk fibers and Floche to see how those match up as well. I will be playing with acrylics next and maybe, if I am still undecided, I'll get the fabric markers out too. Right now I just want to get the fabric prepped for the next project so I can start to work right away when ready.

I am loving the colors for this project!

Big thank you to Joe for getting my laptop back so quickly and doing a great job!

Until next time a small thought nugget:

"If one only wished to be happy, this could be easily accomplished; but we wish to be happier than other people, and this is always difficult, for we believe others to be happier than they are."
~Montesquieu

Tuesday, July 11, 2017

Ladybug Lake Update

Here is the latest and greatest pix of Ladybug Lake. I am going to compare the last one with the latest one, which was taken with my little Canon camera.
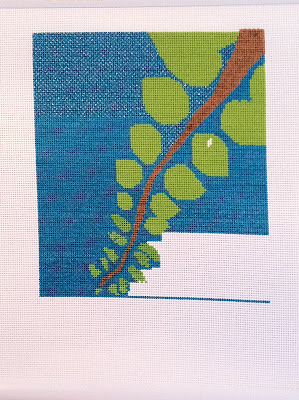
Taken with my old iPhone

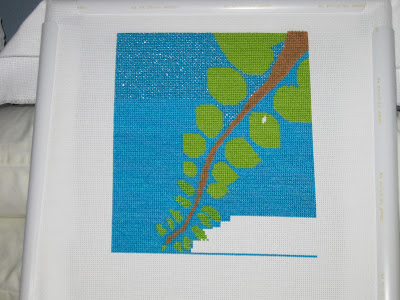
Taken with Canon camera
The Canon pix has the colors right, and there isn't a distortion of the fabric color like the iPhone. Now my iPhone is an old hand me down from my husband, who is more taken with phone technology than I am, so he gets the newer phone and I inherit the old. It's a good working arrangement for the two of us. However, an older technology means that there are discrepancies to be put up with, i.e., the difference in color from the phone camera to a real camera. You can see here too that a bit more progress has been made on the design.

So now with this great upgrade to provide better quality pix, I can feel confident that what I put up on my blog is true to what I am actually seeing, and that is what I want, a better experience for those readers of my blog.

Hopefully the next time I give you an update, I will be at the bottom of the stitching as shown in the pix, and will be starting on the last twenty or so rows beneath it.

In the meantime, I have been experimenting with my Shiva Paintsticks for the next project. I am thinking about painting the background with either the Paintsticks or Jacquard fabric paints to match the stitching, that way I won't have any white background show up. This will take some time to get the fabric ready if I do this, since I have to wash the fabric to get all the sizing out of it so it will take either the oil or acrylic paint and then letting it set up after I paint it. I may even use my Martha Stewart's. I'll have to see how the matching goes. I have also been looking at fibers for it too. So it has been busy here at Pear Blossom Designs, which is okay, because the weather outside has been sweltering. Summer truly is here in Oklahoma.

Stay cool, comfortable and serene until next time.
Debbie

Monday, July 10, 2017

Artist Statement?


The modus operandi for artists has the requirement of an artist statement. Now I have read a lot of artist statements and some are interesting and others I have a hard time understanding. Not that there is anything wrong with the sophisticated explanations, but they are confusing to me as to the pertinence of their art. So after all this research I have tried on a lot of different explanations for my art and tried to be brief, all encompassing, in-depth, insightful, funny, etc., etc., etc.. None of these really gave me an honest story about what I do and why so I experimented more with other variations on this theme and here is what I have come up with that states the who, what, why and how of my artistic endeavors.

My Artist Statement:

I am a self-taught mixed media needlework artist, with a long experience in various types of embroidery, crewel, and cross stitch embroidery, skills passed down from my grandmothers and mother, while others I acquired on my own. Needlework captured my imagination at an early age with its variety of stitches and fibers giving it an almost inexhaustible array of applications and beautiful design possibilities. With the discovery of beads, fibers other than ordinary cotton embroidery floss, and mixed media items that I could use, I soon started coming up with works of my own that employed a variety of these elements. My primary inspiration is the magnificent designs of the famous Faberge eggs. I realized that their quality is what gave them the substance for their longevity and I wanted that same formula for my own work. What makes this work so special to me is that it involves meticulous planning of not only the stitching involved but the placement of all the other elements that make it a beautiful and cohesive whole. That detailed planning and then time exhaustive completion of each project makes the end result more than just rewarding, it is downright magical for me. My future plans are to keep doing the work I enjoy tremendously and make it more interesting and diverse as time goes on, but always, and without fail, to keep it authentically mine.

I understand that there is the general, overall artist statement, but that there are others that will be needed specifically for the actual projects. I believe those will be easier to describe as they are more focused on a particular work or works. So after what seems like hundreds of revisions of the original, I hope this is what is needed for people to understand what I do and why. I believe what is most important for me to stress now is that what I do is truly a labor of love, cultivated over many years, that is still my preoccupation and heartfelt obsession. 

Thursday, July 6, 2017

Perfection in Imperfection


I was discussing with a friend the dilemma I was having about using a vintage brooch that I loved and wanted to design with, but it had a few minor flaws to it that though apparent, really didn't detract from the beauty and individuality of the design. At least that is the way I thought of it.

Now I don't have a set formula for what I require in a brooch or beads or any other embellishments, it just has to strike an inner chord of mine that stirs my imagination. That could be the unique design, the color, the material it is made from, or some other interesting qualities, and in that moment I am careful to look for imperfections as well. However, I never discount a piece if I find one or two things wrong with it because I am not looking for perfection in a piece that is old and may have been a beloved piece of someone in the past and used often for that reason. Don't misunderstand, I have many brooches that are perfect and I love those as well, however, those that are flawed truly show me what women of the past used and cared about and that is what drives the decision to get it even when it has had a small mishap or two along the way. I repair what I can when it is possible without being obvious or if it's not too complicated, but even if the flaw remains, it is still endearing to me because I know that its history was remarkable in some way to someone. I can just imagine the stories these lovely pieces of jewelry could tell if they could only speak.

Even though they sit silently waiting for the next phase of their future, and no one really knows much of their past, they do talk to those that listen and let them know that like people, they can endure much and still manage to maintain a beauty all their own and hold secrets only to be imagined and never told.

Customizing Beads

On my next project, Oriental Expressions, I found some beads that I really thought would be perfect for the design and ordered them. When they arrived, the color was wrong. I had already looked at so many beads that had to be rejected for one reason or another and so was not sure if I could find substitutes for them. When that happens, I turn to my Martha Stewart All Purpose Acrylic Paints that can be used on glass, and therefore, on glass beads. I used the satin finish paint for these and I couldn't have been happier with the results. Since the beads I work with are relatively small, it can be messy, and usually takes several coats of paint to cover completely and some time for them to dry and cure, but the results are well worth it.


I don't like to employ this method except in rare instances when there is no other recourse, simply because I am a purist and prefer to use materials that are 100% of what they claim to be. That is one of the reasons why I would not use any type of glue unless as a last resort to fasten things in my work. And only then the very best of the best that has proven great ability to hold and last indefinitely. My track record in the past with most glues has been disappointing at best, so I avoid them as much as possible. Stitching items onto a base with fibers is my absolute favorite way to go because of its longevity and what I think is just a classier look.

I'm also including a picture of the brooch that is the centerpiece of the design. I love the colors and how unique the design is of this vintage brooch.


Will be updating the progress of Ladybug Lake next time, until then I leave you with this thought:
"Searching for possibilities outside your safety zone will plunge you into learning processes that never stop".
-Michael Fleishman

Monday, July 3, 2017

Studio Pix

So it is time for the big reveal of pix of PBD Studio (Pear Blossom Design Studio) where creativity is always under construction!

Here is PBDS Central, my worktable which actually
is a sewing table I purchased several years ago.

Sewing equipment behind me and a pegboard full
of sequins, stencils, and various supplies. The bead
shelf against the wall was made by my late father-in-law.
There are two matching shelves next to it.

These two matching cabinets hold books, fabric,
and most of my brooches both vintage and new.
It's handy for storing things on top too.

You can see more beads on the matching shelf
and a dress form loaded down with strings of
glass beads. My son-in-law made the apron for
me from vintage fabric. I have my fibers stored
around the form and spilling under the worktable.

This cabinet holds tools, a variety of mixed media
supplies and my fabric paints.


My husband removed the folding doors on this
closet and I installed the curtain rod to hold
larger lengths of fabric and textured papers.
The cabinets inside it are filled with new and old
various shaped beads, crystals, ribbons and trims
and so much more!

Back at the worktable and here is my new and
much improved laptop that should provide me
with the updated technology to take my blog
to bigger and better levels for my readers.

I am very proud to say that with the exception of the shelves my late father-in-law built, all the other bookcases and storage (and even my work/sewing table) I assembled myself. My husband helped a little here and there, but these were primarily my projects. Even though the room is a small repurposed spare bedroom, it holds everything I need and I truly enjoy the space now that I have made it my own for Pear Blossom Designs. I hope you enjoyed the tour and will stay tuned for more activities in the near future.